


Training outfit layering pieces are specialized garments designed to regulate body temperature, manage moisture, and maximize mobility during workouts. The system works as a modular base, mid, and outer framework where each layer serves a distinct function: sweat removal, insulation, and environmental protection. Brands like Patagonia and Arc’teryx have built entire product lines around this principle, and the science behind it applies just as directly to gym training as it does to mountain climbing. Fabrics like merino wool and polyester blends dominate the category for good reason. This guide breaks down each layer type, the best athletic outfit combinations, and exactly how to build your system for any training condition.
1. What are the best base layers for training?
The base layer is the most critical piece in any training outfit layering system because it sits directly against your skin and controls moisture from the moment you start sweating. Its job is not warmth. Its job is to pull sweat away from your body and move it outward so it can evaporate. Get this wrong and every layer above it becomes a liability.
Cotton absorbs up to 2500% of its own weight in water, which means a cotton tee soaks up sweat and holds it against your skin. That creates a cold, clammy feeling mid-workout and raises your risk of chilling down fast when you stop moving. Cotton is the wrong call for any sweat-heavy session.
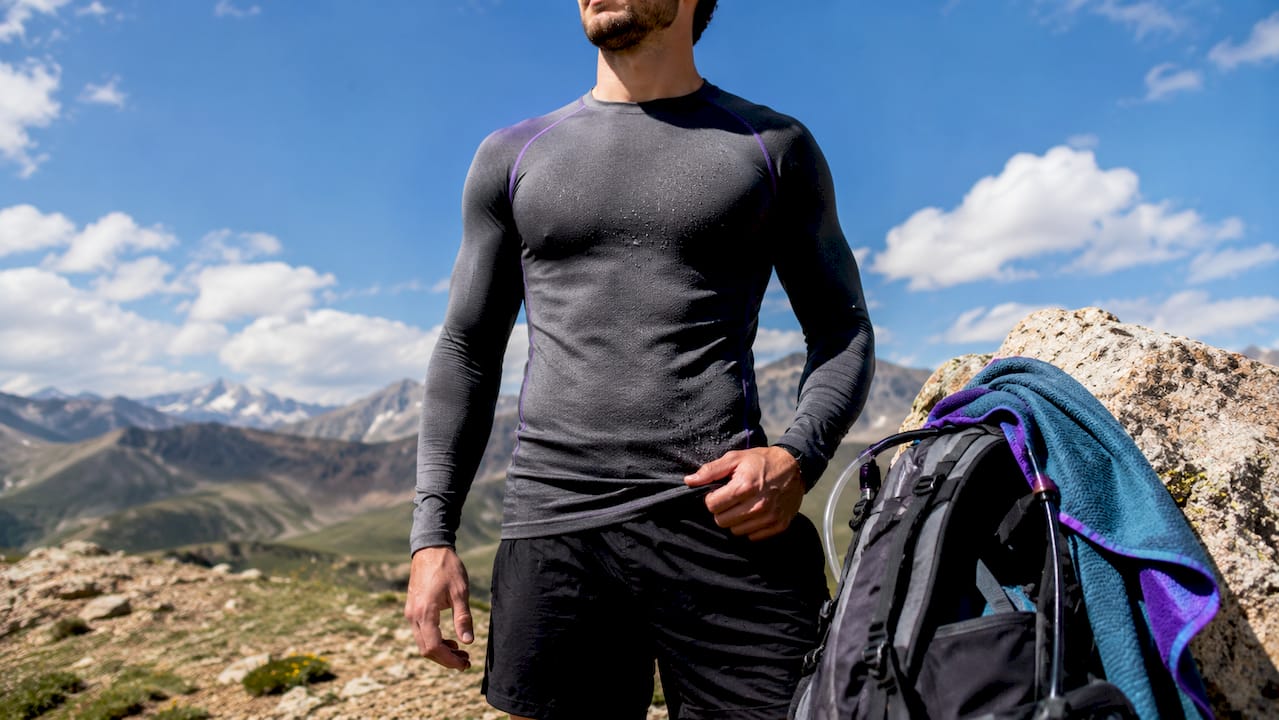
The two materials that actually work are merino wool and polyester blends. Merino wool keeps you warm even when wet and resists odor far better than synthetics, making it the right choice for cold-weather training or multi-hour sessions. Polyester blends dry faster and cost significantly less, making them the practical pick for high-intensity gym work.
Pros and cons of common base layer fabrics:
- Merino wool: Excellent odor resistance, warm when wet, soft against skin. Dries slower than synthetics and costs more.
- Polyester blends: Fast drying, affordable, widely available. Can retain odor after repeated use.
- Nylon blends: Durable and smooth, good for layering under compression pieces. Less breathable than polyester.
- Cotton: Inexpensive and comfortable for low-effort activity. Completely unsuitable for sweat-heavy training.
Fit matters as much as fabric. A base layer needs to sit snug against the skin to transport moisture efficiently. Loose base layers create air gaps that slow moisture transfer and reduce the layer’s effectiveness entirely.
Pro Tip: Use a synthetic polyester base for HIIT and circuit training where sweat volume is high. Switch to merino wool for cold outdoor runs or strength sessions in unheated gyms where odor control and wet-warmth matter more.
For a closer look at how moisture-wicking tank tops perform as base layers in training, Moreciandco has a dedicated breakdown worth reading.
2. How to choose mid layers for warmth and flexibility
The mid layer’s job is insulation. It traps warm air around your core and keeps your body temperature stable between bursts of high-intensity effort. Unlike the base layer, the mid layer is designed to be removed and replaced as your body temperature changes throughout a session.
The three main mid layer types are synthetic fill, down, and active insulation fleece. Synthetic fill and down work well for pre-workout warmup walks or post-workout cool-downs but restrict movement during compound lifts. Active insulation fleece, which uses stretch panels and breathable zones, is the better choice for dynamic training because it moves with you.
| Mid Layer Type | Best For | Mobility | Warmth | Breathability |
|---|---|---|---|---|
| Fleece hoodie | Strength training warm-up | High | Medium | Medium |
| Padded gilet | Cold outdoor training | Very high | High | High |
| Synthetic puffer | Pre/post workout | Low | Very high | Low |
| Active insulation jacket | Aerobic outdoor sessions | Medium | High | Medium |
The padded gilet outperforms a full puffer jacket for cold-weather training because it insulates the core without restricting arm movement. For compound lifts like deadlifts, pull-ups, or overhead presses, full sleeve insulation creates drag and limits range of motion. A gilet solves that problem directly.
For indoor training in cold gyms, below 12°C ambient temperature calls for a fitted base layer underneath your mid piece. Above 16°C, a heavyweight half-zip or fleece top often handles both roles without needing a separate base layer underneath.
Pro Tip: Make your mid layer the piece you pull off first when your heart rate climbs. Keep your base layer on throughout the session and use the mid layer to dial warmth up or down between sets, intervals, and rest periods.
3. Choosing outer layers (shells) that protect without overheating
The outer layer, or shell, acts as your barrier against wind, rain, and cold air. It does not need to be the warmest piece in your kit. It needs to be the most breathable piece while still blocking external elements.
Shell layers built for training use should include specific ventilation features. Pit zips, mesh-lined vents, and high moisture vapor transmission rates are the design details that separate a functional training shell from a standard rain jacket. Without these features, sweat vapor gets trapped inside the shell and you end up wet from the inside rather than the outside.
Key features to look for in a training shell:
- Waterproof rating: Look for at least 10,000mm hydrostatic head for wet outdoor conditions.
- MVTR (moisture vapor transmission rate): Higher is better. Aim for 10,000g/m²/24hr or above for active use.
- Pit zips or underarm vents: Allow rapid heat dumping during intense efforts without removing the jacket.
- Packability: A shell you can stuff into a pocket gets used. A bulky one stays in the bag.
- Stretch panels: Critical for running, cycling, or any movement-heavy outdoor training.
Lightweight shells are particularly useful for gym commutes and outdoor warm-up runs before heading inside. You do not need full waterproofing for a 10-minute run to the gym. A wind-resistant, water-repellent softshell handles that scenario with less weight and more breathability than a hardshell.
Pro Tip: Match your shell to the specific workout, not just the weather. A hardshell is right for a wet trail run. A softshell or windbreaker is right for a cold-morning gym commute. Carrying both and choosing based on the session is the most practical approach.
4. How to combine layering pieces for different training conditions
Dynamic layering means adding and removing pieces based on your current body temperature and exertion level, not just the weather forecast. The system only works if each layer can be put on or taken off quickly without interrupting your session.
Here is a numbered approach to building your outfit before and during training:
- Start with your base layer. Put it on first regardless of conditions. It stays on the entire session.
- Add your mid layer for warmup. Wear it during your first 10 to 15 minutes while your body temperature climbs.
- Remove the mid layer once you hit working intensity. Tie it around your waist or drop it at your station.
- Keep your shell accessible. Wear it during outdoor transitions and remove it when you move indoors or hit peak effort.
- Replace mid layer during rest or cooldown. Your body temperature drops fast after peak effort. The mid layer goes back on.
The table below shows recommended athletic outfit combinations by training scenario:
| Condition | Base Layer | Mid Layer | Outer Layer |
|---|---|---|---|
| Cold outdoor run (below 5°C) | Merino wool fitted top | Active insulation fleece | Windproof softshell |
| Cold gym (below 12°C) | Polyester fitted base | Fleece hoodie or gilet | Optional light shell |
| Moderate gym (12°C to 16°C) | Polyester base or half-zip | None or light fleece | None |
| HIIT outdoors (any cold) | Synthetic wicking base | Light mid layer | Windproof shell with vents |
| Strength training (heated gym) | Fitted polyester base | Optional fleece for warm-up | None |
Effective HIIT layering uses a wicking base, a light mid layer, and a windproof shell. The key is that all three pieces must be removable quickly between intervals. If you cannot strip a layer in under 10 seconds, it is slowing you down.
5. Common mistakes to avoid when layering for the gym
Most layering failures come down to one of three errors: wrong fabric choice, too many layers at once, or mid layers that restrict movement. Each one is avoidable with the right information.
The most common layering mistakes:
- Wearing cotton next to skin: Cotton holds sweat against your body and creates cold spots during rest periods.
- Stacking all layers simultaneously: Wearing base, mid, and shell at the same time during peak effort traps heat and vapor, leading to cold and clammy sensations when you stop.
- Choosing bulky mid layers: Thick puffer jackets restrict shoulder and arm movement during pressing, pulling, and overhead work.
- Ignoring ventilation design: A shell without vents becomes an oven during cardio. Always check for pit zips or mesh panels.
- Treating layering as purely a warmth strategy: Proper layering balances moisture escape and insulation. Vapor management is half the equation.
The mid layer is the most frequently removed piece in a well-functioning training outfit. Design your system around that fact and your base layer will stay dry and effective throughout the session.
Invest the most money in your base layer and shell. These two pieces do the most technical work. A mid layer can be a quality fleece hoodie from any athletic brand. The base and shell are where fabric technology and fit precision make a measurable difference in performance.
Pro Tip: Test your full layering combination during a low-stakes workout before using it in a race, competition, or long outdoor session. What feels right standing still often feels wrong at working intensity.
Key takeaways
Effective training outfit layering pieces work because each layer targets a specific function: moisture removal, insulation, and environmental protection, in that order.
| Point | Details |
|---|---|
| Base layer is non-negotiable | Choose merino wool or polyester blends; never cotton for sweat-heavy training. |
| Mid layer is your temperature dial | Remove it when intensity rises and replace it during rest or cooldown phases. |
| Shell needs ventilation features | Pit zips and high MVTR ratings prevent overheating during outdoor efforts. |
| Layer combinations depend on conditions | Match base, mid, and shell choices to temperature, location, and workout type. |
| Vapor management beats warmth alone | Trapping moisture creates cold and clammy discomfort even in well-insulated outfits. |
Why I stopped overthinking my training layers
I spent two winters rotating through every mid layer option I could find before I realized the problem was not the gear. It was the order of operations. I was putting on too much before my warmup and refusing to take anything off mid-session because it felt inconvenient. My base layer was soaked by the time I hit working sets, and no amount of quality insulation fixed that.
The shift that actually worked was committing to the gilet over a full jacket for cold-weather lifting. The core insulation without arm restriction changed how freely I moved through compound lifts. I stopped fighting my jacket on every overhead press.
I also learned that transitioning gym wear to street style is far easier when your layers are designed to work independently. A clean fitted base layer and a structured mid piece look intentional outside the gym. You can read more about that approach in Moreciandco’s guide on gym wear to street style transitions.
The honest advice: spend real money on your base layer and shell, use a mid layer you can strip in seconds, and test the combination before you need it to perform. Layering is not complicated. It just requires one honest practice run.
— Giuseppe
Build your training kit with Moreciandco
Moreciandco curates training apparel built on the principle of getting exactly what you pay for. Every piece in the collection is selected for technical function and lasting quality, not just aesthetics.
The Moreciandco store carries layering pieces designed for moisture management, active movement, and the kind of durability that holds up across hundreds of sessions. From fitted base layers in performance fabrics to versatile mid pieces that move from the gym to the street without looking like an afterthought, the collection covers every layer in the system. If you want training clothes that actually perform the way they are supposed to, start there. You can also explore the Complesso Collection for luxury layering pieces that combine technical performance with a refined aesthetic.
FAQ
What fabrics work best for base layers in training?
Merino wool and polyester blends are the top choices for training base layers. Merino excels in odor resistance and wet warmth; polyester dries faster and costs less.
When should I wear all three layers during a workout?
Wear all three layers during cold outdoor warm-ups or transitions between locations. Remove the mid layer and shell once you reach working intensity to prevent overheating and vapor buildup.
What is the difference between a gilet and a mid layer jacket?
A gilet insulates the core without covering the arms, which preserves full shoulder and arm mobility during compound lifts. A full jacket provides more warmth but restricts movement during overhead and pulling exercises.
How do I layer for HIIT training in cold weather?
Use a wicking synthetic base, a light mid layer, and a windproof shell with ventilation features like pit zips. Remove layers quickly between intervals to prevent overheating and keep the base layer dry.
Does layering work for indoor gym training or just outdoor workouts?
Layering applies directly to indoor training, especially in cold or unheated gyms. A fitted base layer paired with a fleece mid piece covers most indoor cold-weather scenarios without needing a shell layer at all.